Skip to content
ReviewScanGo
  • Help Center
ReviewScanGo

Getting Started

9
  • Start Here: How to Launch Your First Campaign Funnel (Overview)
  • Review Compliance
  • What Is ReviewScanGo and How the Smart Funnel Works
  • What Happens After a Customer Scans the QR Code
  • Verified vs Unverified Reviews Explained
  • Product Reviews vs Seller Feedback
  • Supported Platforms
  • Supported Countries & Marketplaces
  • Supported Languages

Campaign & Smart Funnel Setup

9
  • How to Create a Campaign
    • Adding Products
    • Creating Promotions
    • Creating Campaigns
  • Testing & Activation
    • How to Test Your Campaign Funnel
    • Campaign Status Explained
    • Common Campaign Setup Mistakes
  • QR Code Management
    • Downloading & Printing QR Codes
    • Emailing or Sharing Your Campaign Link
    • Using Existing Insert Cards

Promotions & Coupon Codes

10
  • Promotion Types
    • Gift Cards
    • eGift Cards
    • Discount Code or Promo Code or Virtual Gift Card
    • Free Products
    • Digital Download
  • Coupon Code Management
    • Entering Coupon Codes
    • How to Bulk Upload Coupon Codes
  • Gift Cards & Promo Setup
    • How to Create an Amazon Promotion in Seller Central
    • Where to Get Gift Cards or Promo Codes
    • How to Buy and Process eGift Cards

QR Codes

4
  • Downloading & Printing QR Codes
  • Emailing or Sharing Your Campaign Link
  • Using Existing Insert Cards
  • How to Test Your Campaign Funnel

Insert Cards & Compliance

4
  • Where to Get Insert Cards Made
  • Using Existing Insert Cards
  • Review Compliance
  • Amazon Compliant Insert Cards

Claims Center

2
  • How the Claims Center Works
  • How to Buy and Process eGift Cards

Branding & Advanced Features

2
  • How to White Label Your Smart Funnel
  • How to Add a Meta Pixel

Account & Billing

3
  • Upgrade or Change Your Subscription Plan
  • Plan Limits Explained
  • What Happens When You Downgrade Your Plan

Troubleshooting & Support

4
  • Campaign Not Active
  • QR Code Scans But Funnel Doesn’t Load Properly
  • Running Out of Coupon Codes
  • Contact Support
View Categories

How to Create an Amazon Promotion in Seller Central

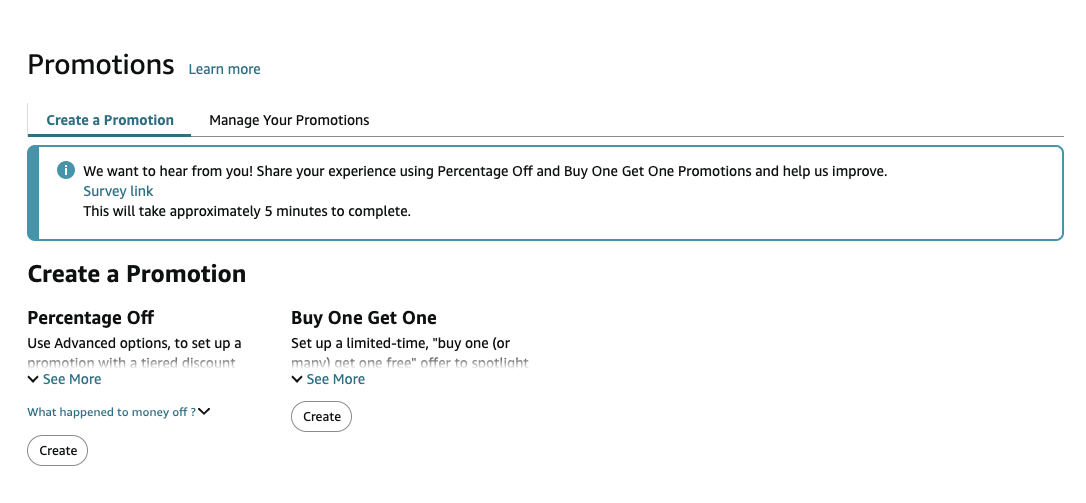
Log in to Seller Central and navigate to Avertising > Promotions and on the Percentage Off option, click Create.

Step 1: Set the Promotion Conditions #

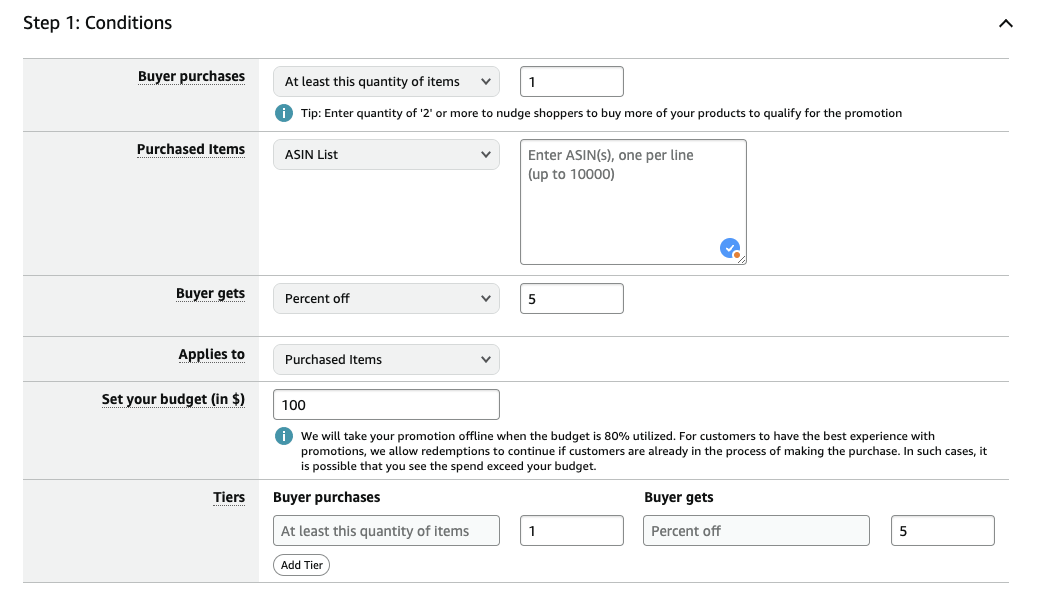
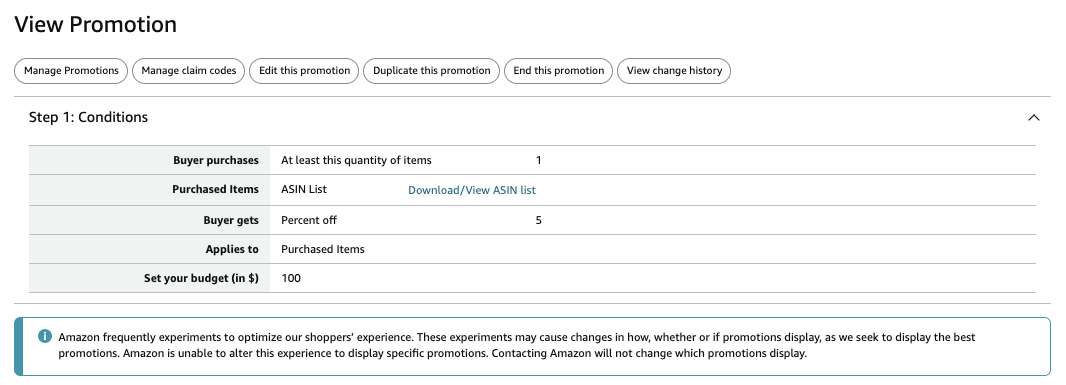
Buyer Purchases: Set how many items the shopper must purchase in order to claim the promotion. We recommend setting this to 1

Purchased Items: Choose which product or products this promotion applies to

Buyer Gets: Set the discount the shopper will get. We recommend at least 5% off

Applies To: We recommend setting this to Purchased Items

Set Your Budget: Set your budget

Tiers: Set these to the match the previous values you’ve set above

Step 2: Set the Promotion Schedule: #

Start Date: Choose the date and time for the promotion to start

End Date Choose the date and time for the promotion to end

Step 3: Set Additional Settings #

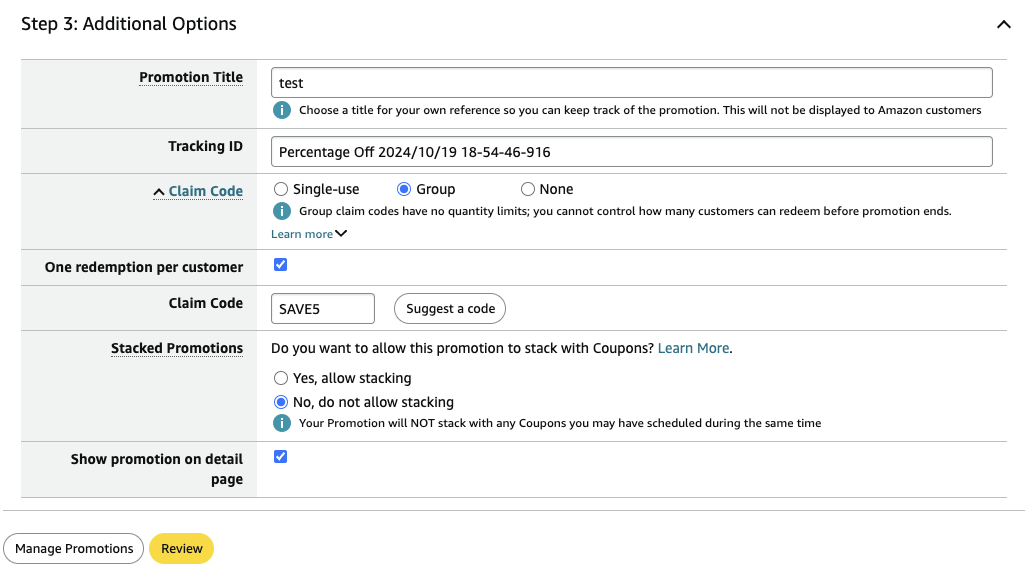
Promotion Title: Give your promotion a name

Tracking ID: Leave this as default

Claim Code: We recommend setting this to Single-Use or Group. Choose Single-Use if you want each shopper to get their own promo code – you will have to generate a list of codes on the next step. Choose Group if all shoppers will use the same promo code.

One Redemption per customer: *IMPORTANT* Make sure this is checkmarked

Claim Code: If set to Group, enter the promo code the shoppers will use to claim this promotion

Stacked Promotions: Choose if you want to allow shoppers to stack additional discounts with this promotions

Show promotion on detail page: Choose if you want this promotion displayed on your product detail page

Step 4: Review Promotion #

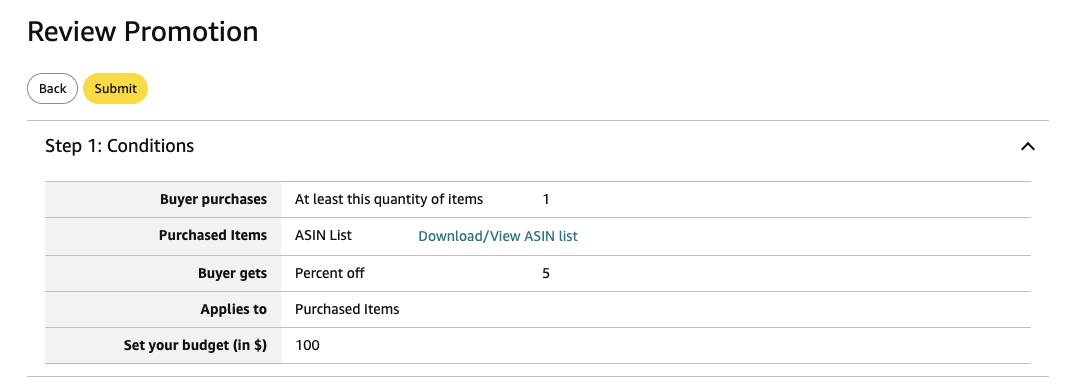
Review the promotion settings and click Submit

Optional: Generating Promo Codes #

If you chose Single-Use, you’ll need to generate the unique claim codes for the promotion. Each shopper will get their own unique code to claim your promotion.

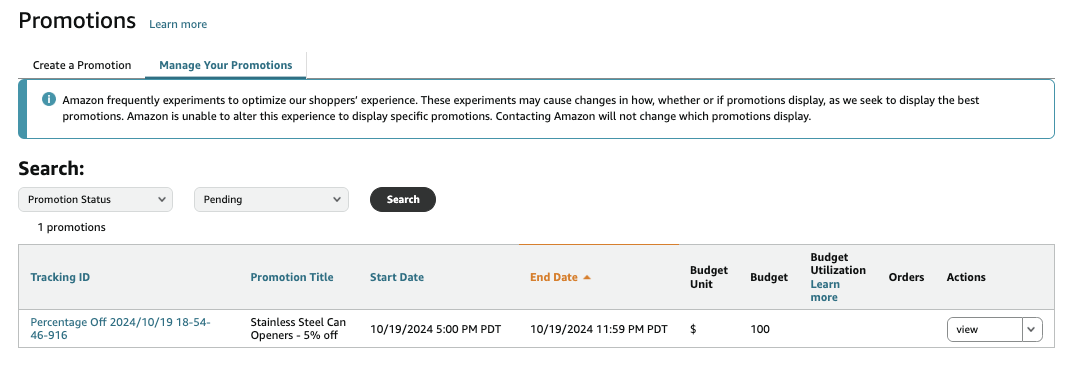
Step 1: Click on Manage Your Promotions. If you don’t see your newly created promotion, choose Pending from the drop down menu and click Search.

Step 2: Under Actions, click View

Step 3: Click on Manage Claim Codes.

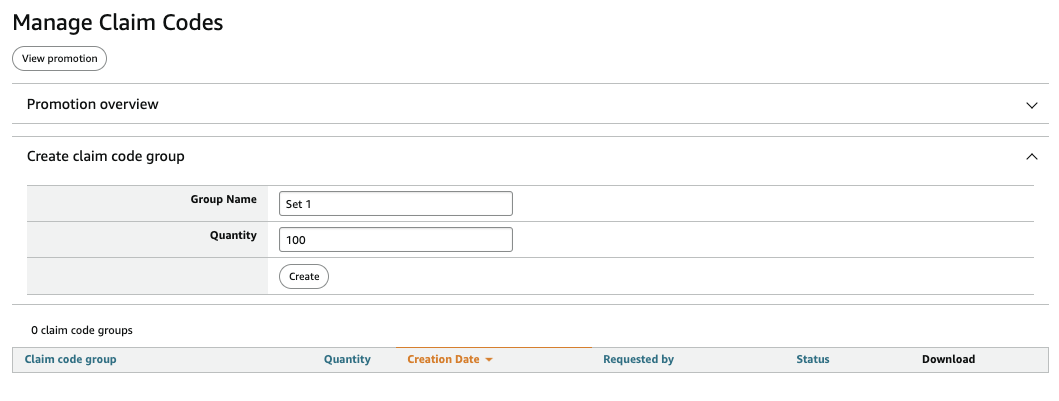
Group Name: Give this set of claim codes a name

Quantity: Choose how many codes you’d like to generate

Click Create

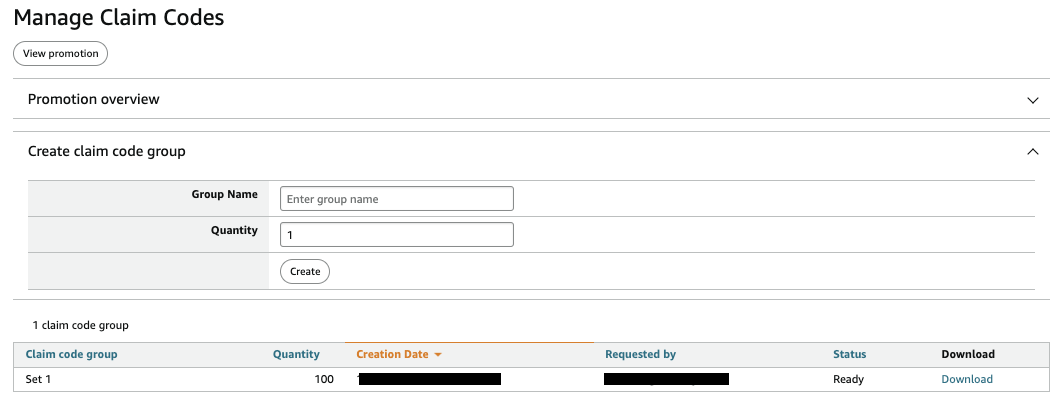
Click Download and save the list of generated codes.

Enter the codes in your promotion on ReviewScanGo. If you run out of codes, you can generate more codes on Amazon by following these steps and add them to your promotion at any time.

What are your Feelings

  • Happy
  • Normal
  • Sad
Table of Contents
  • Step 1: Set the Promotion Conditions
  • Step 2: Set the Promotion Schedule:
  • Step 3: Set Additional Settings
  • Step 4: Review Promotion
  • Optional: Generating Promo Codes

© 2026 ReviewScanGo

  • Help Center